Non-Destructive Testing (NDT)

Non-destructive testing of downhole equipment is a way to determine its characteristics without compromising the integrity, serviceability, and reliability of the equipment. SCL employs the following non-destructive testing methods:

  • Optical-laser inspection of screen slot clearances;
  • Equipment welds defectoscopy;
  • Ultrasonic thickness gauging.

Optical-laser Control of Screen Slot Gaps


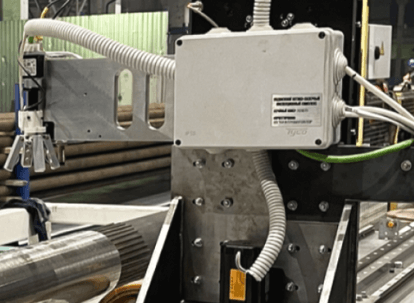
Two methods are typically used to check the quality of slot screens of sand screens: manual with metric probes and automatic with an optical inspection machine. However, manual inspection can be time-consuming and imprecise. At SCL, we use the Kvantron-150 laser-optical complex to check screen slot gaps. The inspection machine obtains a digital black-and-white image of the screen slot clearances with high accuracy and highlights the light and shadow borders that define the boundaries of the screen slot clearances. Automatic inspection with the machine enables us to check the distribution of slot gaps along the entire length of the screen element with a high accuracy of 10 microns. It is important to control the slots since the distribution of screen slot gaps significantly affects the effects of sanding and colmatation.

Screen manufacturers and customers use several criteria to evaluate the slot gaps distribution. The inspection machine software system is set up to evaluate the clearance distribution according to Statoil, Schlumberger, and Exxon criteria. All the evaluation criteria are based on similar principles. At least a certain fraction of the clearances must fall within a given interval around the nominal with a given probability. The choice of the clearance distribution evaluation criterion is determined according to the customer’s requirements. The Automatic Slotted Gaps Test program involves testing a sample screen along the entire length of the screen element with rotation around the axis.

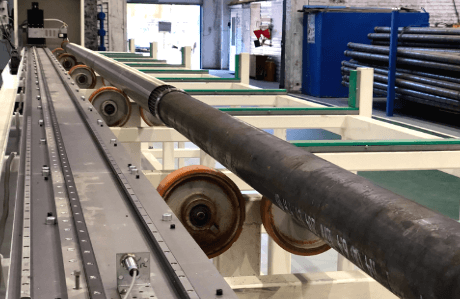
Kvantron-150 optical-laser Screen Gaps Inspection Machine

Technical characteristics of the inspection machine

  • Length of the unloading table for horizontal movement of the scanner – 10,000 mm;
  • Screen size – 3 ½ to 7″;
  • Screen slot clearances – 100 to 1,000 microns;
  • Movement system units: horizontal movement unit, vertical movement unit, unit of screen rotation around the axis;
  • Micrometer resolution – 5 microns;
  • Calibration accuracy – 10 microns;
  • Scanning speed – 3-5 slots/s 
  • Auxiliary subsystems of the stand:
    – Control unit with a touch screen;
    – Industrial lighting;
    – Laser range finder.

Non-destructive Testing procedure

  • First, the sample to be tested is placed on the table of the inspection machine. The NDT testing program is then selected based on the criterion by which the slot clearance distribution will be evaluated;
  • The test process is initiated with the option to stop when the clearance deviates by a certain amount. At the beginning of the test, the column with the scanner of the inspection machine automatically moves to the starting position for testing the screen element;
  • The non-destructive inspection machine then enters scanning mode with the help of the remote distance adjustment subsystem to scan the screen element. During this mode, the scanning speed reaches a value of 3-5 clearances per second. The vertical scanner movement system allows for the adjustment of the distance of the scanner to the screen surface to ensure that the image is in focus;
  • If the inspection machine registers an abnormal slot clearance whose size differs from the nominal by more than the specified parameter, the scanning is stopped. The operator re-checks the abnormal slot situation with the probe;
  • After each test, the inspection machine generates a report on the slot-clearance distribution with a calculation of the statistical parameters of this distribution and an evaluation of the fulfillment of validity criterion of this distribution;
  • Finally, after the entire test series, a general test report is produced to indicate the fulfillment of the validity criterion of the wire winding.

The inspection machine undergoes periodic calibration as a measuring instrument to ensure measurement accuracy. Its accuracy is confirmed by certification from independent metrology laboratories.

Defectoscopy for Welded Joints

To ensure the quality of welded joints for downhole equipment, our testing company utilizes the capillary defectoscopy method. This technique involves the penetration of liquid substances through the weld seam by capillary forces. The capillary flaw detection method increases the color contrast of the defective area of the weld in comparison to the quality weld. The services can detect various defects related to the non-welded seam line, pores, and sinks.

During the test, a specially colored indicator is used to fill open cavities and form an indicator pattern. Surface-active substances (surfactants) are added to improve the penetration of the indicator liquid into the existing cavities of the weld. Using a special developer, the indicator material is fixed to fully reveal defects in the welds.

Want to order a service and find out more?
You may also be interested in other categories

This site uses cookies to store data. 
By continuing to use the site, you consent to the use of these cookies.

This site uses cookies to store data. 
By continuing to use the site, you consent to the use of these cookies.